The Ultimate Guide: How to Rebuild a Motor From Start to Finish
Is your car’s engine making scary noises? Does it feel weak or burn a lot of oil? You might think you need a new car, but there’s another option. You can rebuild the motor yourself! This guide will show you how. We’ll take you through every step, from figuring out the problem to starting your newly rebuilt engine. This is the complete engine rebuilding guide you need to bring your car back to life and save a lot of money.
Table of Contents
- What Tells You an Engine Needs a Rebuild?
- Should I Rebuild, Replace, or Buy a Crate Engine?
- What Tools Do I Need for an Engine Rebuild?
- Where Do I Get the Right Parts?
- How Do I Take the Engine Apart?
- How Do I Clean and Check the Engine Parts?
- What is Engine Machining and Do I Need It?
- How Do I Put the Engine Back Together?
- What is the Engine Break-In Process?
- What if I Run into Problems?
- How Do I Make My Rebuilt Engine Last?
What Tells You an Engine Needs a Rebuild?
That terrible sound from under the hood can be scary. An engine knocking sound, sometimes called a rod knock, often means serious trouble inside. It’s a deep, heavy thump that gets faster as you press the gas. This is one of the biggest signs an engine needs rebuilding. You might also see lots of blue or white smoke coming from your exhaust. This is a classic engine smoking symptom that points to worn-out parts inside, causing excessive oil consumption.
Another big sign is a loss of power. If your car struggles to get up hills or feels sluggish, it could mean the engine isn’t making power like it used to. This is often because of low compression in the cylinders. An engine compression test is a simple way to check this. If the test shows low or uneven numbers, it’s a strong sign that internal parts like the piston rings are worn out. Frequent engine overheating causes can also point to a problem, like a bad head gasket, which is a key part of any head gasket replacement during a rebuild.
Should I Rebuild, Replace, or Buy a Crate Engine?
You have a few choices when your engine fails. The path you take depends on your budget, your time, and what you want to achieve. Let’s break down the options.
Rebuilding vs replacing engine is a big decision. A DIY engine rebuild can be the cheapest option if you do the work yourself. You get the satisfaction of fixing it and can even aim for a performance engine rebuild to get more horsepower. A full rebuild can give your car amazing engine longevity. However, it takes time and the right tools. A professional rebuild costs more, but you get a warranty on rebuilt engines. A crate engine is a brand new or remanufactured engine you can buy and install. This is often the fastest but most expensive choice. For classic car lovers, a classic car engine rebuild helps keep the car original.
Here is a simple look at the costs:
| Option | Cost Range (Estimate) | Time Required (DIY) | Skill Level Needed |
|---|---|---|---|
| DIY Engine Rebuild | $500 – $2,500 | 40-80 hours | High |
| Professional Rebuild | $2,500 – $5,000+ | 1-2 weeks (shop time) | N/A |
| Used Engine | $500 – $3,000 | 15-25 hours | Moderate |
| Crate Engine | $3,000 – $8,000+ | 15-25 hours | Moderate |
To be sure about your decision, an auto mechanic can help. They can do tests like a leak down test or oil analysis to find out exactly what’s wrong. This helps you understand the full motor problem.
What Tools Do I Need for an Engine Rebuild?
Doing an engine overhaul requires more than just a basic socket set. You’ll need some specialized equipment to do the job right. Having the right tools makes the process smoother and ensures everything is put back together correctly. Don’t worry, you can often rent some of the bigger tools.
First, you need an engine hoist to get the motor out of the car and an engine stand to hold it while you work. These are essential. A good torque wrench is a must-have. Every bolt on an engine has a specific tightness, known as torque specifications, and getting them right is critical. You’ll also need precision measuring tools. A micrometer is used for measuring engine clearances on parts like the crankshaft. Plastigauge is a special waxy string that helps you check engine bearing replacement clearances, which is super important.
Here’s a basic engine rebuild tools list:
- Complete socket and wrench set
- Engine hoist and engine stand
- Torque wrench
- Piston ring compressor
- Valve spring compressor
- Feeler gauges
- Micrometers and a bore gauge
- Cylinder hone (for deglazing)
- Scrapers for old gaskets
- Lots of plastic bags and a marker for labeling!
Where Do I Get the Right Parts?
Once you know what you need, it’s time to shop for parts. You can often buy an engine rebuild kit, which includes most of the common parts like gaskets, bearings, and piston rings. These kits are a great way to save money and make sure you have everything. You’ll need to choose between OEM parts (Original Equipment Manufacturer) and aftermarket parts. OEM parts are made by the car company, while aftermarket parts are made by other companies. Both can be good, but always buy from a trusted seller.
Your engine rebuild manual will have a complete engine components list. This includes big parts like the piston, connecting rod, and camshaft, and smaller items like the oil pump, water pump, and timing chain. Don’t forget fluids and sealants! You’ll need special engine assembly lube to protect parts during the first start-up and thread sealant for certain bolts. Getting quality parts is key for good engine performance and long life.
How Do I Take the Engine Apart?
The teardown is where the real fun begins. Organization is your best friend here. Before you remove a single bolt, take lots of pictures from every angle. This will be your map when you put it all back together. Get a box of sealable bags and a permanent marker. Every bolt, bracket, and small part you remove should go into a bag and be labeled immediately. Trust me, you’ll thank yourself later.
Start by removing everything attached to the engine, like the alternator, power steering pump, and manifolds. This is often called the engine teardown steps. Once the engine is on the stand, you can start digging into its heart. Remove the oil pan and valve covers. Then, take off the cylinder head. This will expose the pistons and cylinders. Carefully remove the crankshaft and the connecting rod assemblies. As you take parts out, keep them in order. For example, keep the parts for cylinder #1 separate from cylinder #2. This is crucial because parts wear together and should go back in the same spot if you plan to reuse them.
How Do I Clean and Check the Engine Parts?
With the engine in pieces, it’s time for a deep clean. Every single part must be spotless before you measure and reassemble it. Years of oil, carbon, and grime need to go. You can use degreasers and wire brushes for most parts. Pay special attention to the oil galley plugs and all the little passages inside the engine block. Any leftover dirt can ruin your newly rebuilt engine. Some people take their block and heads to a machine shop to be “hot tanked,” which is a powerful chemical cleaning process.
After cleaning, it’s inspection time. This is the most critical part of the motor overhaul process. Look for any cracks in the engine block or cylinder head. Use your micrometer to measure everything. Check the cylinder bore for wear. Is it still perfectly round? Check the journals on the crankshaft and camshaft for scratches or wear. You’ll be comparing your measurements to the torque specifications engine manual. This tells you if a part is still within the safe range to be reused or if it needs to be replaced or sent for machine work.
What is Engine Machining and Do I Need It?
During your inspection, you might find that some parts are worn beyond the limits set in your service manual. That’s where a machine shop comes in. A good machine shop has the tools and expertise to fix these parts. For example, if your cylinders are worn, they can bore them to a larger size. This is called decking the engine block. Then you would use new, oversized pistons.
Other common machine shop jobs include crankshaft grinding, where they smooth and resize the journals. They also perform cylinder head repair, like cylinder head resurfacing to make sure it’s perfectly flat, or replacing valve guide seals. A shop can also handle connecting rod reconditioning. You need these services to ensure all parts fit together perfectly. This precise fit is what makes an engine run smoothly and last a long time. It also helps improve fuel efficiency after rebuild.
How Do I Put the Engine Back Together?
This is where all your hard work pays off. Assembly is a careful, step-by-step process. Before you start, clean your workspace and all your parts one last time. You want it clean enough to eat off of! Have your engine rebuild manual and your torque wrench ready. Following the right engine assembly tips is key.
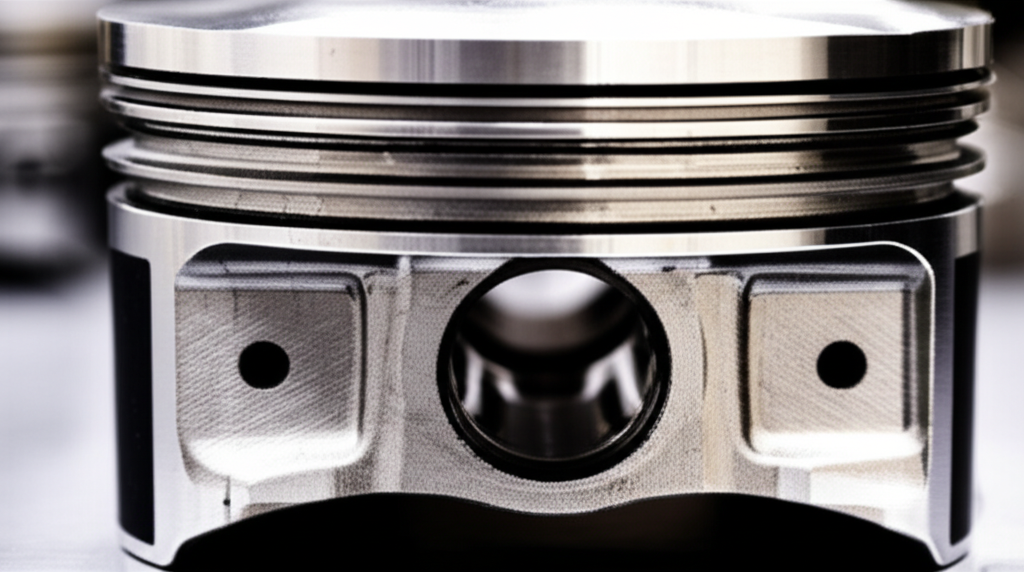
Start with the clean engine block on the stand. Carefully install the new main engine bearing replacement parts. Gently place the crankshaft and check the clearance with plastigauge. Once it’s perfect, you’ll tighten the main caps to their exact torque spec. Next, you’ll assemble your new piston rings onto each piston and attach them to the connecting rods. Use a piston ring compressor to gently slide each piston into its cylinder. Then you’ll install the camshaft and new timing chain replacement parts, making sure the timing marks line up perfectly. After that, you’ll install the freshly prepared cylinder head with a new head gasket. Always follow the correct tightening sequence for the head bolts. It’s a precise dance, but so rewarding.
What is the Engine Break-In Process?
You’ve done it! The engine is back in the car, and you’re ready for the first start-up after rebuild. But wait! The first few hundred miles are critical for the engine’s long-term health. This is called the break-in procedure. The goal is to let the new piston rings seat properly against the cylinder walls. This creates a good seal for compression.
For the first start, make sure you have oil and coolant. It’s a good idea to prime the lubrication system by turning the engine oil pump with a drill before you start the engine. This gets oil to all the moving parts. Once it starts, hold the engine speed around 2,000-2,500 RPM for about 20 minutes. This helps the camshaft and lifters wear in together. For the first 500 miles, use special engine break-in oil, which has additives to help with this process. Avoid hard acceleration and driving at a constant speed on the highway. Vary your speed to help the rings seat. After about 500 miles, change the oil and filter.
What if I Run into Problems?
Even with the best planning, sometimes things don’t go perfectly. Troubleshooting rebuilt engine problems is a skill. A common issue is leaks. Double-check every gasket set installation, especially the oil pan gasket and valve cover gaskets. If you hear strange noises, shut the engine off immediately. A ticking noise could be a simple valve lash adjustment issue, but a deep knock could mean a serious problem with a bearing.
Low oil pressure is another scary problem. It could be a faulty oil pump or a clearance issue you missed during assembly. Overheating could point to an air bubble in the cooling system or an incorrectly installed thermostat or water pump. Don’t panic. Go back through your steps. Check your photos and your manual. Many times, it’s a simple mistake that’s easy to fix once you find it. Understanding the basic motor principle can help you think through how all the parts work together to find the source of the issue.
How Do I Make My Rebuilt Engine Last?
You’ve put so much work into your engine. Now you want it to last! The key to engine longevity is good vehicle maintenance. That means changing the oil and filter on time, every time. Use high-quality oil and filters. Don’t skip your regular checks of the coolant, belts, and hoses.
Your driving habits also matter. Let the engine warm up for a minute before driving off, especially in cold weather. Avoid revving a cold engine. Regular driving helps keep everything lubricated and in good shape. By taking care of your rebuilt engine, you can enjoy many more years and miles of reliable performance. You’ve given your vehicle a new heart, and with a little care, it will serve you well.
Key Takeaways for Your Engine Rebuild Journey:
- Diagnose First: Make sure a rebuild is what you need. A compression test and checking for smoke or noises are good first steps.
- Be Organized: Label and bag everything during disassembly. Taking photos will save you headaches later.
- Cleanliness is King: You cannot get parts too clean. Any dirt can cause major damage during assembly.
- Measure Everything: Don’t guess. Use tools like a micrometer and Plastigauge to check all clearances against your service manual.
- Use a Torque Wrench: Every critical bolt has a specific torque spec. Tighten them correctly to avoid leaks and failures.
- Don’t Skip the Machine Shop: If parts are worn, professional machining is not a corner you want to cut.
- Follow the Break-In Procedure: The first 500 miles are critical. Be gentle with your new engine to ensure it lasts a long, long time.